Friday, February 26, 2010

Feature Friday #14

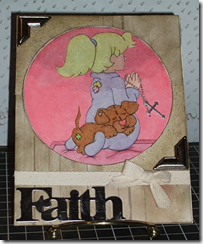
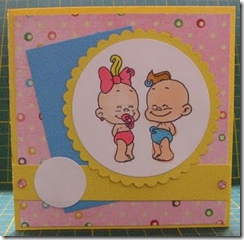
I (Diane) am hosting this week's challenge at The Character Cafe. My challenge was to make a monochromatic card with all the extras. To offset the lack of color, feel free to add prima flowers, ribbons, brads and bling and show off your embellishing talent!


Here's my card:


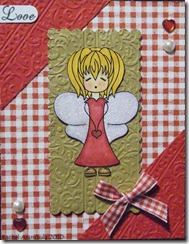
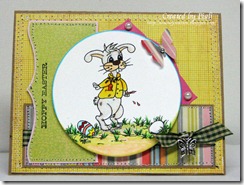
Here are the cards from the girls that are working with me this week:


And we have two special Guest Designer who were winners from this month's release:


The prize for this weeks' challenge is the Ballerina Allison and Lillies images from The Cafe Store, a 15% off Discount Coupon for your entire purchase, a Winner's Blog Badge as well as your blog featured in our Winner's Section of the store (I will update this soon... been delayed by my computer woes, sorry!).

We hope to see you play along this week, it's great seeing all the wonderful creations!

Diane

Thursday, February 25, 2010

Winner, TCCFF13 – Recipe Challenge

Hello bloggers!  We had a bunch of players this week, and some great creations to blurf through so thank you :) 

Up for grabs this week was Benjamin Bunny and Boots n Hearts from The Character Cafe Store, a 15% off Discount Coupon, blog badge and your blog featured in our Winner’s Section of the store.

We went to random.org in order to pick this weeks’ winner (maybe if we consistently have enough players, we’ll pick our top 3 best creations???!!!) and it came up #1!….

Congrats to Jeri M of Crafty J’s Place (currently inundated with Twilight yumminess – thanks Jeri!), who won with this creation…

WinnerJeriM 

I’ll be e-mailing you in the next day or two, but if you haven’t heard from me yet, and you’re reading this, shoot me an e-mail just in case I can’t find one for you or mine are going missing in cyberspace somehow! LOL

Okay bloggers, check back later for Feature Friday Challenge #14 hosted by Diane… we also have 2 Guest Designers with us this week, Stacie and Vicki, so be sure to come see what inspiration they have for you.

Happy crafting!

Kendra

Tuesday, February 23, 2010

Tek Tuesday – More than JUST a stamp!

Hey there all you crafters it's Tek Tuesday here at the Cafe!!

We are sad to announce that Meredith has left our team.  Her plate was getting too full being on numerous Design teams and trying to juggle family life...she had to step down as part of our Tek Tuesday Team.  Even though it's sad to see her go, Kendra and I have been having fun hosting a few Tek Tuesday Tutorials.

For our tutorial today we will be showing you how easy it is to take any digi stamp, enlarge it, lighten the image, print it, colour it with watercolours (or other medium) and voila! ~  handpainted/coloured artwork for your walls.

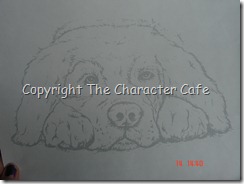
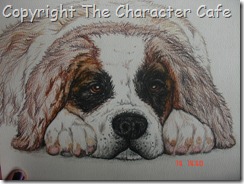
I chose to use Calvin for this, I enlarged him to be big enough to fit an 8.5" x 11" sheet of water colour paper.  I'm thinking you could probably send the file to your local print shop too and manage a larger scale, just check on the kind of paper they'll print on, or maybe bring in your own?  In my Coreldraw program I changed the outline colour from 100% black to 20% black, (Kendra tells me it can be done in Paint Shop Pro also) You want it light so it resembles a light pencil sketch.  Either that, or if you want really simple, just change your printer settings to a fast draft print (or equivalent).  Print it and then heat set it, rub it with microglaze, or spray it with a fixative.013 I then coloured him using my water colour pencils 015adding the water after he was completely coloured, (you can see above where I’ve added the water around his eyes).... 

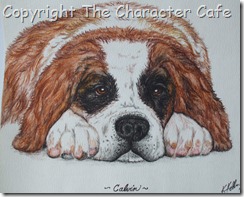
Calvin5 There you have it... pretty simple, artwork ready to be framed and hung on your wall (I just finished him today, so maybe we’ll be back once he’s framed!).

And one last close up… (ain’t he cute?!)

Calvin2 Glad you stopped by this week, pop back in on Friday for Feature Friday Challenge #14.  Diane will be hosting a colour challenge... I've seen her card and it's awesome!!

Craft with you soon!!
Kelly "the imaginary illustrator" ;)

Friday, February 19, 2010

Feature Friday Challenge – LUCKY #13!

Hi bloggers!

I'm baaaackkkk! Yes, I had to get a new laptop because my little one pushed mine off the table and well, it was going to cost $620 for a new screen!!!! This one's a tad bit faster, with a bit more RAM and hard drive space, but really, my old one was just fine (my hubby's on the other hand, could've used a push LOL, what can you do though? - don't say trade him either!

Anyway, we're on to Challenge #13 this week at The Character Cafe and Kelly and I are hosting it. Since we had some computer trouble, we're going to ask our winners from last week to participate in next weeks' challenge instead of today.

The Challenge this week is a Recipe Challenge… not an easy task for the likes of me, but I managed (barely)… hope you care to take the challenge too and show us what you’ve got!

The Recipe is as follows:

1 Digi Image (if you don’t have any, we’ve got freebies)

3 Pieces of Paper

5 Embellishments

That’s it… and against all “odds” (ha ha ha, I know, not really funny), I actually did it! I didn’t think I would though because more than 1 paper, max 2 is usually it for me, and then I couldn’t figure out my embellishments, but alas, I did and here it is… (excuse the unedited pics, I haven’t added my photo editor yet)

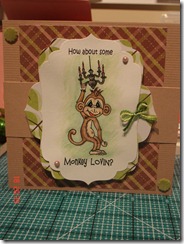
039 I’ve used Monkey Lovin from The Character Cafe, coloured fabulously by Kelly with watercolours, Bazzil cardstock, We R Memory Keepers DP and some from my stash, 2 pearl gems coloured with Copics, 2 Making Memories brads and some thread.

For your added inspiration, we have a few more for you too…

From RachelRachel


and Piali

Piali


Deanne created this one...

For the prize this week, we have Benjamin Bunny (image Piali used) and Boots n Hearts from The Character Cafe. You will also receive a Winner’s Discount good for 15% off your entire purchase at The Cafe Store, a winner’s badge for your blog and your blog featured in our winner’s section of the store.

Well, that’s it for this week… hope you find some time to play along with us.

Happy crafting,

Kendra & Kelly


Thursday, February 18, 2010

Winner, TCCFF12 – Colour Challenge


Just here to announce the winner from last weeks’ Colour Challenge… and we didn’t add the prize to the post, so the winner will receive 3 Digital stamps/images of their choice from The Character Cafe store along with the 15% off Discount code, Winner’s Blog Badge and their blog featured in our Winner’s Section at The Store.

Without further ado… the winner is Adele from Nogards Space with this card…

Winner12Pic

Congrats Adele, I’ll be in touch soon, but if you haven’t heard from me in the next few days feel free to send an e-mail just in case we can’t find one for you, or ours gets stuck somewhere in cyberspace!

For our previous winners… due to our recent computer woes, we haven’t managed to send out any of your winning images but rest assured, we’ll be getting to that too in the next couple days… just gotta move my date over to the new computer now that I got it!

Okay bloggers, come back later and check out next weeks’ challenge and play along… we love to see what you create!

Happy crafting,

Kendra

Monday, February 15, 2010

Today's Multi Fold Tutorial ..............

Happy Tuesday to you all,
Here is today's tutorial
You will need -
a piece of card measuring 296mm long x 121mm wide, and a matching 62mm square.
Character Cafe Images of your choice.

Fold length ways down the middle,
like in the photo below.

Mark on both ends at the edges at 58mm and 103mm,
mark on the centre fold at both ends 78mm (just a dot will do for this)

Score straight across the width of the card at the 58mm marks,
then from the dot in the centre of the card diagonally up to the 103mm marks on the edges,


Score straight across the width of the card at the 58mm marks,
then from the dot in the centre of the card diagonally up to the 103mm marks on the edges,
With the back of the card facing you fold along the 58mm score line towards you.

Choose your images from the Character Cafe shop.
and colour, I have cut my chosen images out.
Apply these to the two squares at either end of the card.


I made a 3rd square with Happy 80th Birthday Dad on.
and then put name under this in the centre, as I used these for table place settings for
his birthday meal.
Below you can see the finished project.
This can be used as cards, place settings anything you wish.


Hope you enjoyed todays tutorial,
and look forward to seeing them used in our Friday Challenge.
Thanks for stopping by
Hugs
lilacanglia
x X x

Thursday, February 11, 2010

Feature Friday Color Challenge

Good morning all! It’s me-Sara-I’m your host for this weeks’ challenge which is a color challenge. My challenge to you is to use the colors-Pink, Blue and Yellow! I know this sounds a little different, but I promise you that you will end up liking it ALOT!! So without any more jabbering from me, here are the other DT’s adorable examples. Also make sure you link you creation using mr. linky. And please visit the other DT members blogs to see what they’ve created for you this week!

Sara-Me

TCC--pink-yellow-blue

Billie

Billie's challenge

Diane

TCC - Robbie Racoon - U Stole My Heart 0210

Fink

ff blue,pink yellow fink

Lola

lola's color challenge

Heather

Heather'

Have a wonderful day, and have fun with the challenge!


February Blog Hop Winners!!

Hey there it's Thursday... and its time to announce our winners from the February New Release Blog Hop.

But first I must make mention that I have been having some computer issues...touch wood...everythings working o.k. right now ( I hope I don't jinx it ). Secondly Kendra's laptop was working just fine until her 19 month old ds decided to see if it would bounce when thrown on to the floor...well it didn't bounce...it's pretty much toast. She's waiting to find out what can be salvaged if anything. Yah... Kendra's not a happy camper right about now. So please please please be patient with us if you need to reach us and you don't hear back from us within 24-48 hrs like we usually are able to respond...it could mean I'm ...oh I don't even want to say it... it could mean I'm having problems again with mine.

Now onto the winners from the hop...

Congratulations to Vicki W, who was picked by random org from the comments. Vicki W. you have won 4 images of your choice. We will be contacting you soon, so you can let us know which images you would like...again please be patient with us considering our puter problems.

Now for the Grand Prize...our entire new release...the winner is Stacey Congratulations Stacey you've won all 9 new images.

Here is her creation using "Bertie and friend"


We will be contacting you soon and sending you your images. It was pretty easy...no challenge, just had to make something (using TCC images) and post it...however if you used a TEK TUESDAY TECHNIQUE you automatically win 2 free images of our choice. Stacey we will be sending you two more images for incorporating a Tek Tuesday Technique in your project. Last but not least we have another entry who also used a Tek Tuesday Technique... Congratulations Linda B...we will be sending you 2 free images of our choice, we'll get that to you soon.

Thanks for hopping along with us this week hope you enjoyed it!!

Don't forget to visit tomorrow, Sara is hosting this weeks FF Colour Challenge. So stop by and play along.

Kelly & Kendra

Monday, February 8, 2010

Tek Tuesday - Paper Bag Purse

Hi all,

It's Kendra here, with your Tek Tuesday installment. Angie E is out of commission for a bit and we hope she's back up and running soon, but for today, you're stuck with me.

I have never done a tutorial before, but I came across this paper bag idea while thinking of something to share with our Sparks and Brownies group this Thurs. I have been enlisted to do the craft for the night and since Angie couldn't make it for today's post, I figured I'd share with you how we're making our "treat bags" for Valentines day....

It's SUPER EASY, and versatile... you can decorate this for anything... I'm thinking, Birthday Parties, Easter, quick thank you bags and really, just because!

Here it goes...

For supplies you will need
  • an 8.5 x 11 sheet of cardstock (you'll have left overs)
  • a 12" strip of 1" width ribbon
  • 2 brads
  • 1 paper bag
  • velcro piece (or other type of closure)
  • adhesives and embellishments

First off, my paper bag is 5" across and I am making them 4" tall, so I cut a piece of cardstock at 4"x5" for the front...

and 4"x6" for the back and lid... score the lid at 4" and 5"...

Next, I'm showing you how I attached the cardstock because those darned paper bags are not always straight and even (I so wanted to rip them apart and re-make them, but didn't!)... I cut the paper bags at 4" tall (sorry, I didn't get a pic of this, but if you fold over the bottom part of the paper bag that sits flat so that it tries to line up with the extended side already - it won't line up if your bags are like mine but that's ok - then score at 4" and cut)... line up your cardstock with the TOP of the paper bag - the part you cut... You may have cardstock that overhangs the bottom a bit. This will make your bag stand better if that's the case (uneven bags)... having said that, put your adhesive on the bag, not the cardstock... In the pic below, you see how I folded the cardstock BACK so I could see how it lined up with the paper bag and it hangs over the one bottom edge a bit...

Then (and you could probably do this FIRST), I lined up the lid on my ScorPal so that I could easily mark at 1/2" for my brads (you see my ooops, score line? LOL)...Then, I folded over my ribbon so it would be purty and added my brads (this was a tester I had done (we're not using that old magnet, it was just for show for my Sparks/Brownies leaders to get the idea)...
Then, just embellish as you see fit... I went to the dollar store and got a whole bunch of glittery goodness for the kids... then I decided when I was making this for you all, that it was missing something... A STAMP!!!! I've decided, I'm going to pre-stamp all the cardstock pieces because it just makes it IMO... no, sadly, it's not a TCC Stamp, but it's still super cute and works perfect for this. When I added the velcro, I decided it'd be better with some sort of reinforcement so I added a 1" stripe of heavy DP to help keep it from tearing when the kiddies are opening and closing their purses. I'm sure I don't have to tell you how to apply the velcro right? I bought the little circle dots at the dollar store (16 sets, not bad).

The kids are also going to get to make cards for their love ones (those will be with TCC stamps), but you don't get to see them unfortunately, because I'm not done preparing them yet! LOL.

Here's the finished product (well, as finished as it'll get for 5-8 yr olds!), however, I did decorate the back too, same sort of stuff...
Sorry for the bad pics in spots, my 19 month old has decided that naps are not an option the past couple days and it's really been throwing me for a loop so this last pic was done tonight under poor lighting, but you get the idea!

Hope you enjoyed this little tutorial and can find some way to use it. I actually LOVE how easy it is (my tester with NO direction/instructions and embellishments added, only took me 10 minutes, that's how easy it was!).

Happy crafting!
Kendra

Friday, February 5, 2010

February New Release Blog Hop is here!

Hey bloggers...

We've got some great digi stamps / images for you this month and our DT gals have been working hard on some super inspiration as usual. If you haven't been hopping along with us, you'll want to head over to the START first. Don't worry, you should end up back here later :) You should have come from Heather's site if you've been hopping...

So, did you pick up the FREEBIE along the way? If not, you can find a few at The Cafe Store and try them out... be sure to come back here and link up to Mr. Linky for your chance to win the entire February New Release Set (that's 9 images!!!)

If getting crafty is just not in the cards, we wouldn't leave you out in the cold... just leave us a comment, why not let us know what you'd like to see from TCC next???? We'll draw a name and the winner will receive 4 of the Feb. New Releases of their choice... Also.... we want YOU to be our Guest Designer for February 19th!!!!! Of course, it's your choice, but we're offering it up to our winner :)

Also, make sure you commented on the DT blogs along the way because they will each be drawing a name in order to give away the digi stamp they were working with!

This hop was pretty simple... been a bit crazy around here lately. We hope that you enjoyed all the fantastic inspiration and get lucky & win some TCC images!!! Better yet, we'd like to see you use them too... they're no good sitting on that hard drive of yours - LOL

So, happy crafting, come back soon to link up that creation of yours and here's an added bonus that I just decided on.... use a Tek Tuesday project idea and we'll send you TWO (2) FREE images from our stock just because :) Let us know though because the list is growing (although not quite fast enough... I have to update that list, I'm a bit behind... please forgive me?)

I'm going to share an image released earlier in the month... I've been playing around with PSP and digital colouring... what do you think? I know, lots of practice, but it's a start!


Okay, so I'm off...
Happy crafting
Kendra


Thursday, February 4, 2010

Winner Feature Friday Challenge #11 - Sketchy...

Well, I'm back to report the winner for Feature Friday Challenge #11... we had a great sketch to work with and the winner, with this creation...

is... LINDA, from Card Challenges & More!

You've won Birdie Love and Love Bug Cupid digital stamp/image sets from The Character Cafe, as well as a 15% off Discount Coupon for your entire purchase, a blog badge as well as, we're adding you to our specials section of our website!

I'll be e-mailing you shortly, but if you haven't heard from me, please feel free to check your spam and then if nothing, give us a shout... life's a bit busy and it's release time :)

Thank you to those that do play along in our challenges, we really appreciate your time and efforts!

Be back shortly for February New Release Blog Hop... "see" you then!
Happy crafting,
Kendra

Tuesday, February 2, 2010

Tek Tuesday with Meredith!! Swing Card Tutorial!!!


Hello Everyone!!! Welcome to another awesome Tek-Tuesday!! This week I am bringing you a SWING or FLIP-FLOP card. I tried VERY hard to photograph measurements and each step, however...I was having a hard time as I was trying to figure it out as I went so my pictures were not coming out as I had hoped. Thankfully Beate Johns at SCS (she's GENIUS!) has a wonderful tutorial - which is where I learned to make this and the template above is also attached to the SCS link I've provided you. The template above is very simple and easy to work with. You will need the following to create the base:
  • Pencil
  • Trimmer
  • Ruler
  • Scoring Blade or Scor-Pal
  • Cardstock for base
For decorating:
  • Assorted cardstock for decorating
  • Any embellishments
  • 2 images or an image and a sentiment or which ever combination you'd like
I had decided that I really wanted to go with a Valentine's Theme but with a really vintage vibe. So I had to truly beat up my images!! My sentiment was colored in MS Paint, heavily distressed with my hands and then with ink and then coated in a heavy coat of Crackle Glaze and set to dry overnight. The bee image (which is RIDICULOUSLY CUTE) was distressed with a sanding block, lightly inked over and crumpled up a bit. I used my clear Stickles to coat his wings in to make them pop. I used a variety of old vintage reproduction cards that I cut up and pieced around the edges, a few embellishments that have been needing a home and voila! It all came together.
The thing I like most about this card is that it really is minimal work with a huge WOW factor.

So fun!!

I hope you've enjoyed this tutorial and thank you again to SCS and Beate Johns for the ever so detailed information!!

Have a great week everyone!!

XOXO-
Meredith